


Recently, I'm quite attracted to lomography. This type of photography is so unique and fascinating. The quality of lomography image is so bad and this kind of bad quality that make it so special...
To shoot lomography, you need a special camera and film. For more information, visit this site...
Last two days, I've been looking around for the tutorial of creating lomography effect on digital images. I find articles from Photoshop Tutorial, Addicted to Design and Digital-Photography_School are quite useful. After going thru those articles, I decided to create my own lomography effect for my digital images. Below are the steps I took to create the lomo effect...
First of all, you need to open a digital image. For your info, I'm using Adobe Photoshop CS...
Then, duplicate a layer of the original image. The duplicate image will be used to do touchup-ing. If you don't like the first touchup, you can always duplicate one more copy from the original image without open the new one...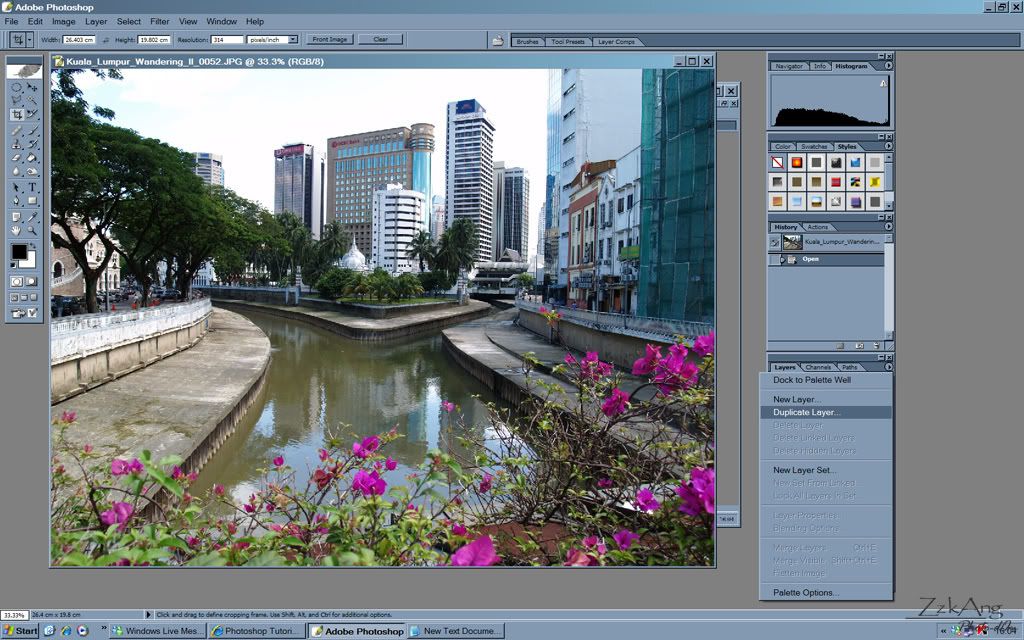
To make a good lomography effect on digital image, it is important to create a film-like effect on the digital one first. After going thru references above, I come out with my own way to create the film-like effect. Firstly, I sharpened the image using Unsharp Mask...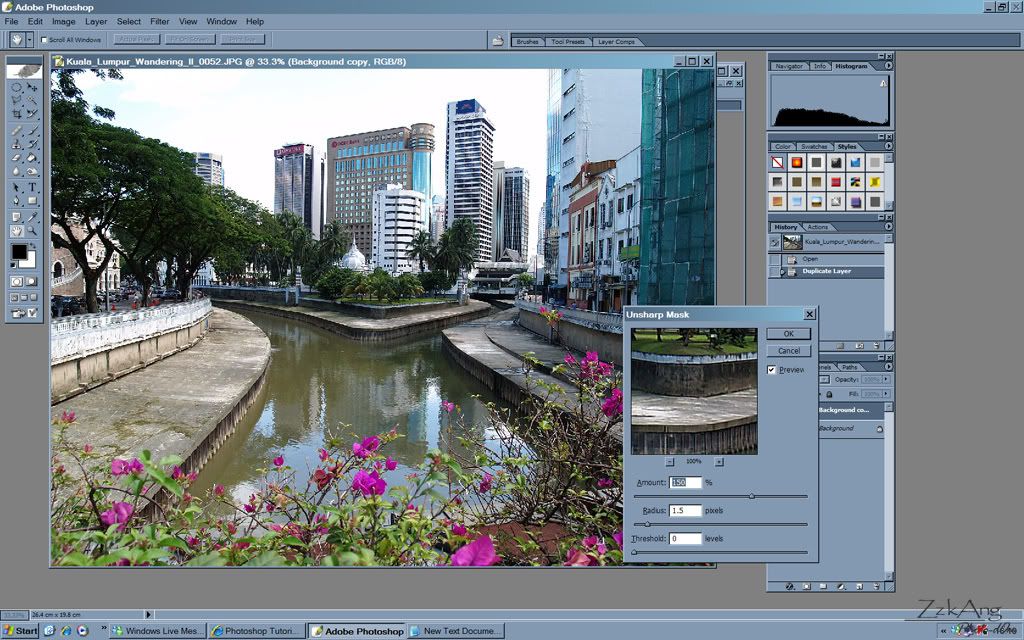
Then, i add some noise to the image...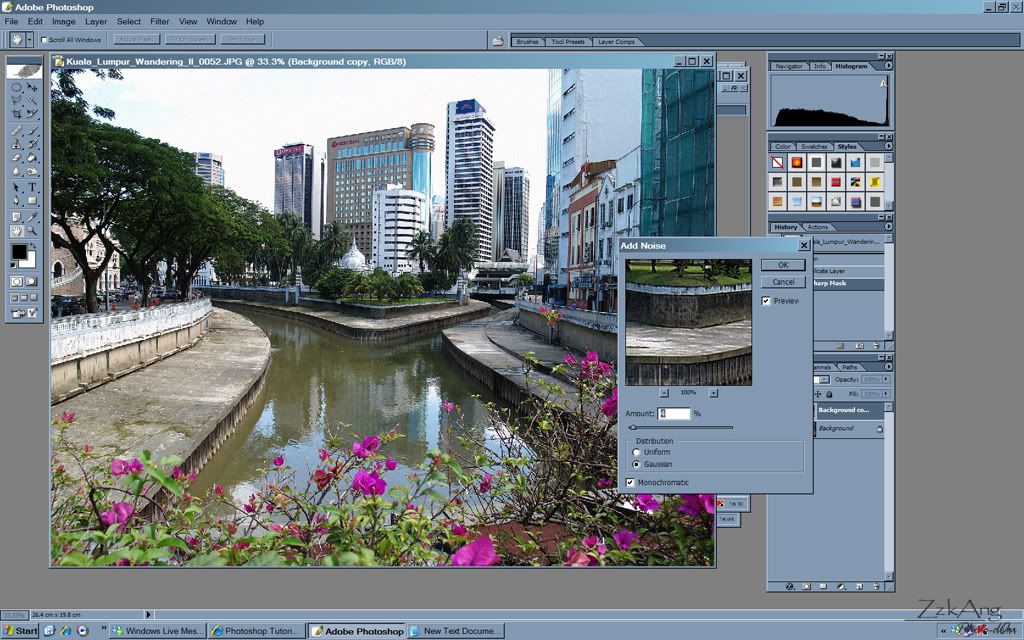
Lens Blur effect is added to make the image not so 'digital'...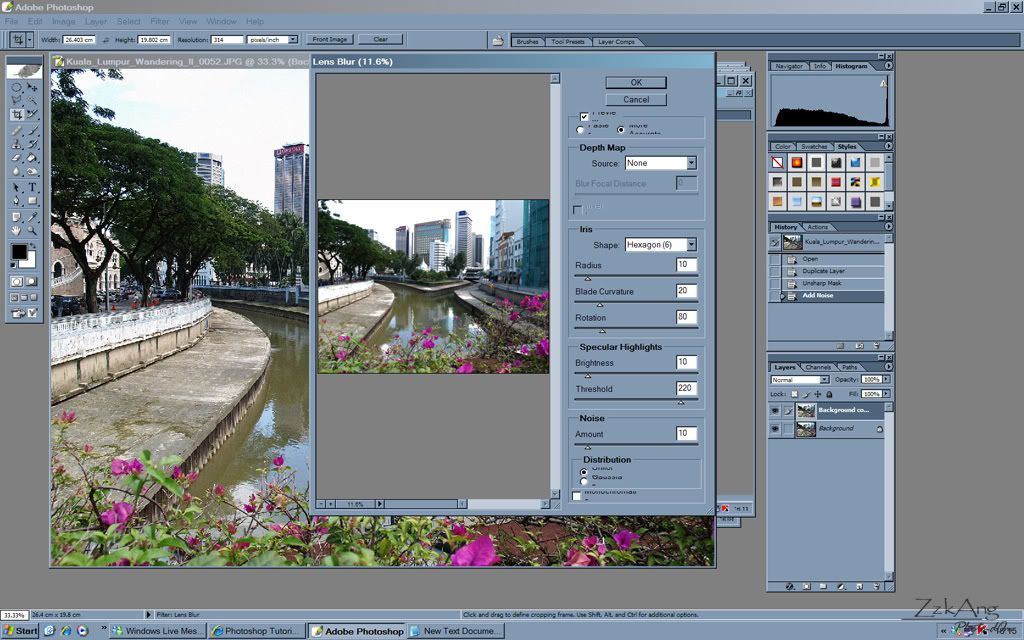
More noise added...
After that, we need create lomography colour on the image. Inside the Channel palette, select the red channel. Then, go to Image > Adjustment > Brightness/Contrast to adjust the contrast of your liking...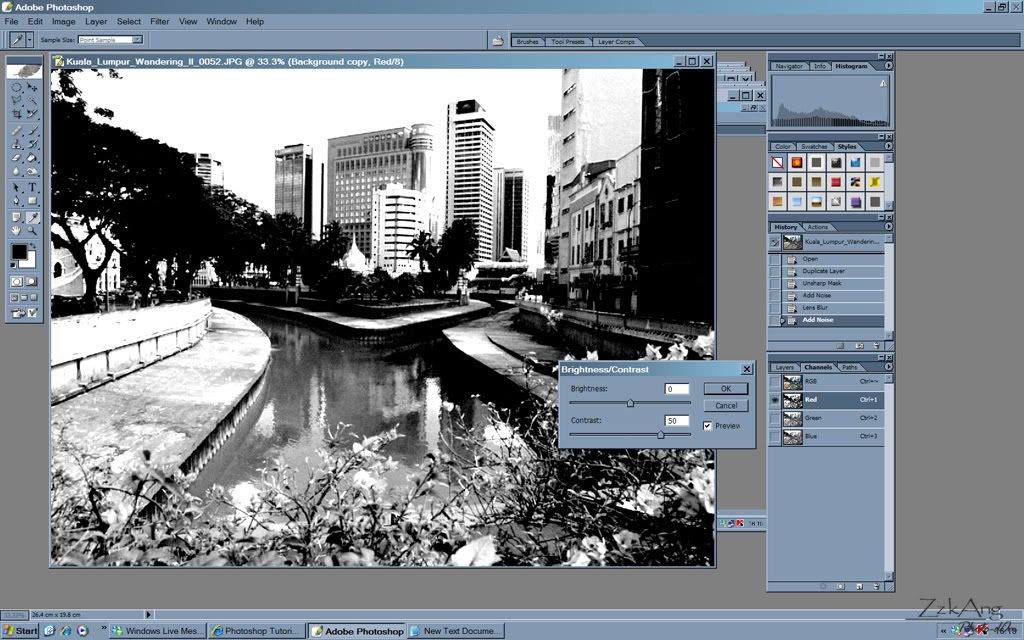
Then, select the green channel and do the same on Brightness/Contrast. Click on RGB channel to go back to colour/RGB mode and you will get lomo-like colour on your image...
If you like vignette effect on your lomography image, you can create vignette on your image. Go to Select tool and select the area close to the edge of the image. Then, set Feather to 80px and inverse the selection...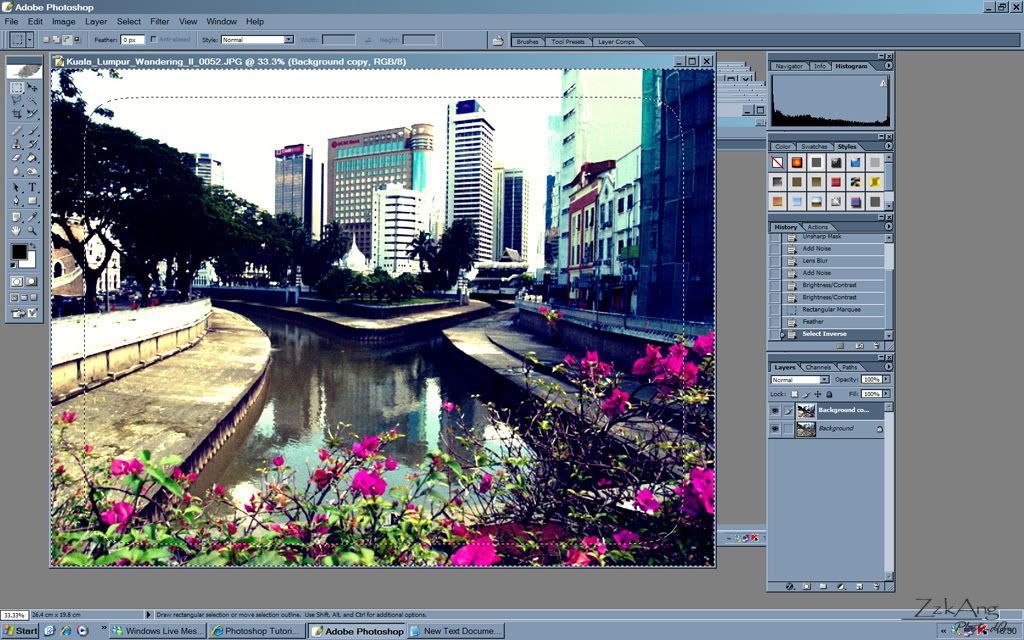
Go to Layer > New Adjustment Layer > Levels to create vignette effect by adjusting input levels and output levels to your liking...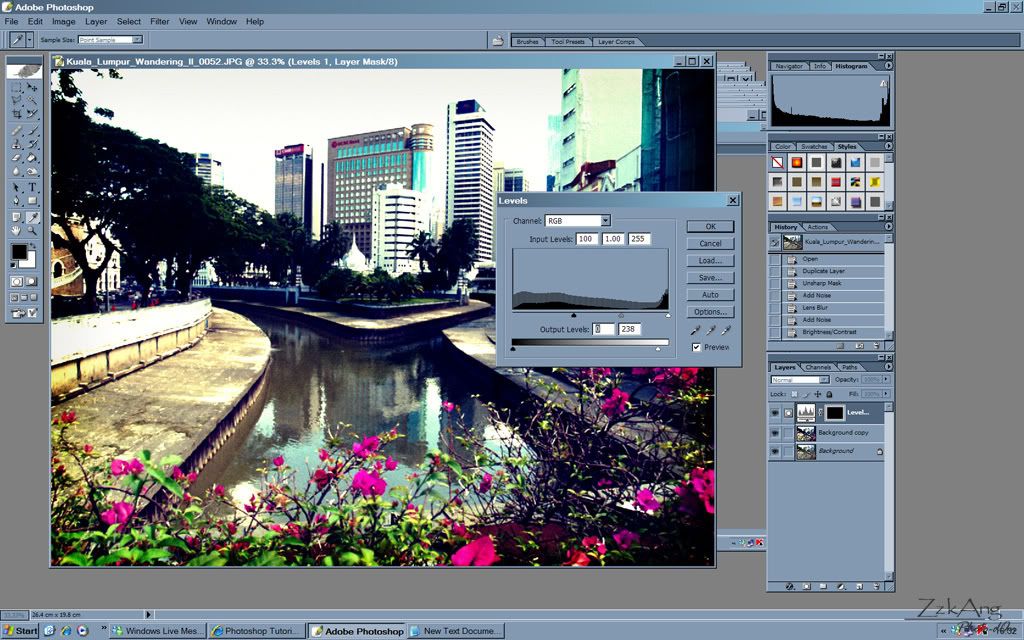
Almost finish. You can add more adjustment to your image like Curves, Brightness/Contrast and Hue/Saturation depends on your liking. For myself, I like more contrast and unsaturated on my lomography image...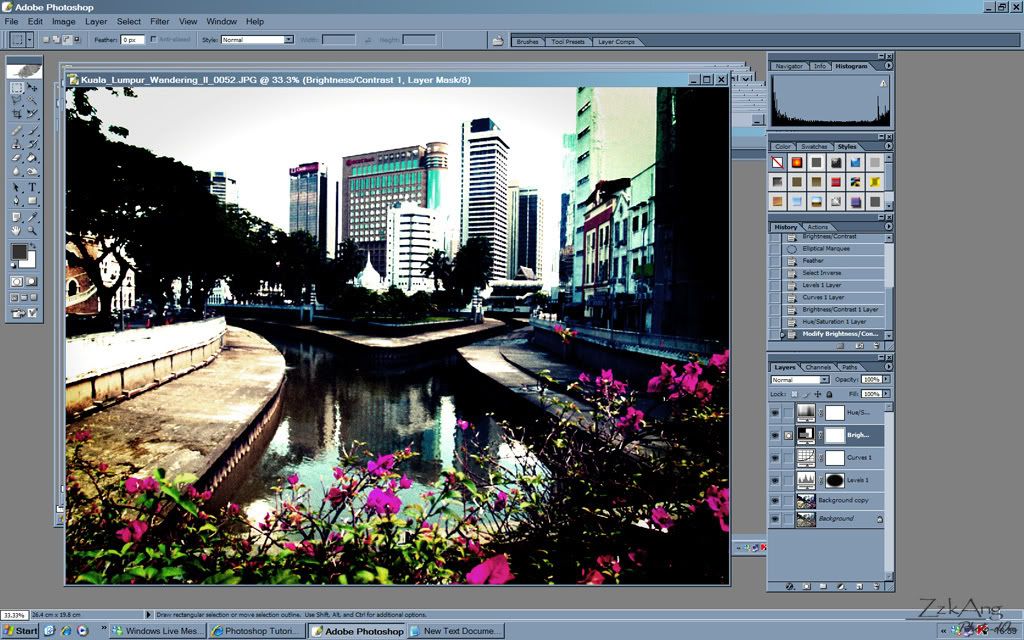
I'm not good in giving tutorial, I hope you understand what I posting about...After this, I will start my new assignment on lomography...Do visit back :)


Featured Post
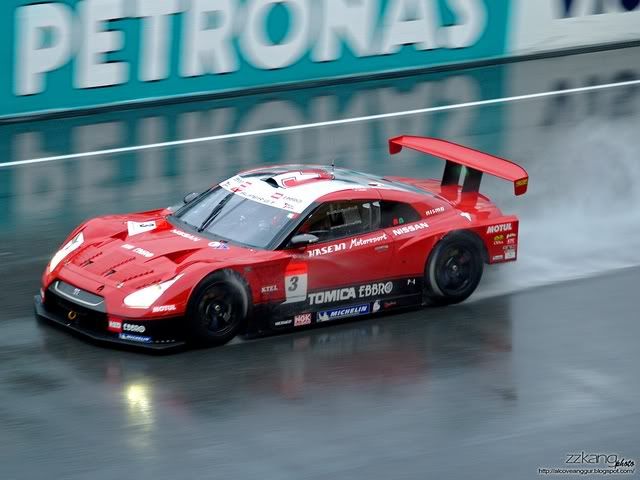 Super GT Round 4 Malaysia 2009
Last year I'm able to visit the Sepang F1 Circuit pit lane. It was an awesome experience to me as I can get very close to the machines and of course, race queens... Read More...
______________________________________________________________________________________________
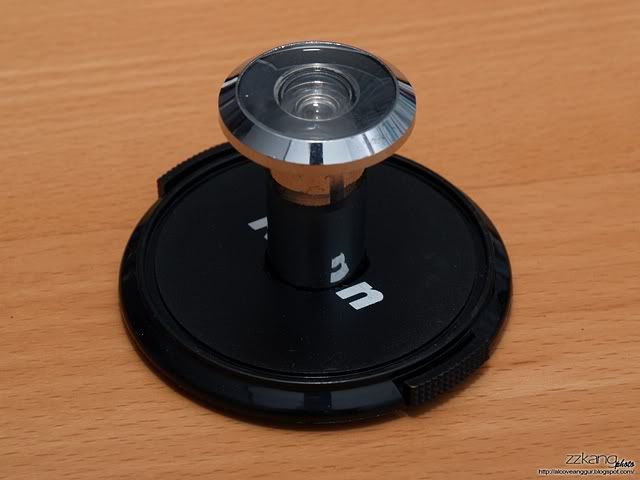 D.I.Y. Fisheye Lens
Since I bought my E-500, I had been dreaming of a fisheye lens. But until now, I still cannot afford one. What I like about the fisheye lens are the effect of the round distortion and it can cover super ultra wide angle of sight... Read More...
______________________________________________________________________________________________
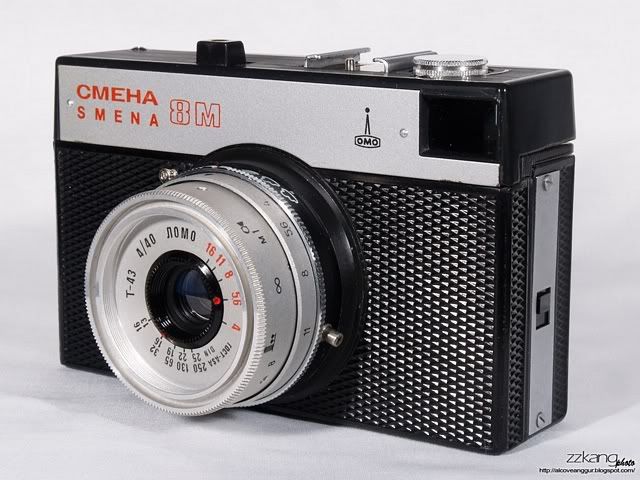 Lomo Smena 8m
The word "Smena" (Cmeha) is roughly translated into "Young Generation" in English. True to its name, the Smena line of cameras were designed to provide inexpensive, accessible, and excellent photography tools to the hard-working young Soviets of the time... Read More...
______________________________________________________________________________________________
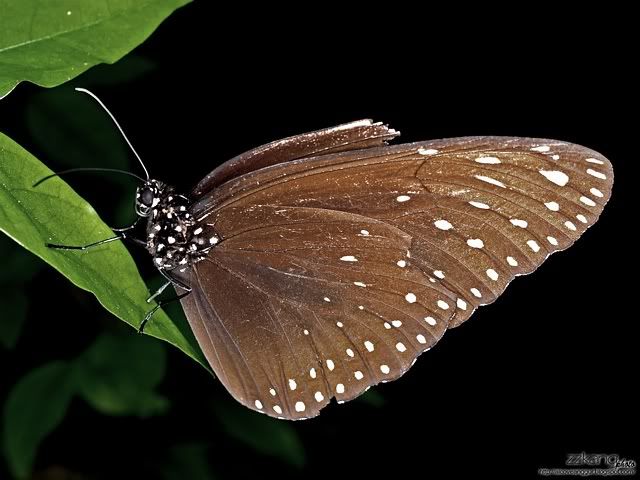 Kuala Lumpur Butterfly Park
Not long after i bought the Olympus Macro Flash System, I went to Kuala Lumpur Butterfly Park to test out the system for outdoor macro photography... Read More...
2008-05-03
How to Create Lomography Effect on Digital Images...
Subscribe to:
Post Comments (Atom)


8 comments:
This is interesting.
bug...give it a try!!! :)
HEY ZZ!!!
I've been dying to start with lomography but can't due to lack of info on it. but thanks to u, u made it come true!!! YOU ARE MY LOMO GOD!!! HAAAIILLLL TO YOUUU!!!
This is cool. I'm trying with my photos right now. Thanks for the sharing! =)
raymond...youre welcome...but me no god...me also learn from other people...hehe..hope you enjoy creating your own lomography!!! :)
colourfulworld...yeah...try try try...hope to see your lomography soon... :D
very interesting post here. ..
i had learn a new thing from you today ^^
i really thought those pics were straight out from Lomo camera with film!!!
guess now i may save those money on Lomo camera + film. i can manipulate those effect from Photoshop too.
geeee... thanks bro .. i will dig more info from the Google too
cheers~
alpha ace...
thanks ya...
u can manipulate everything in photoshop to get different effect of lomo...but i can tell that pics taken from analog lomo n film can be very interesting n unexpecting...try out some analog lomo...its quite cheap actually... :D
Very interesting article on lomography. I think that if you can manipulate stuff like this in photoshop you will be able to do whatever you want with photos.
Post a Comment