


Finally, I made myself a drybox for my camera equipment after leaving them all around my room for 2 years plus. Well, I cannot afford a mini size drybox selling outside. I rather use the money to upgrade my lens. :D
I had been searching around the Net for DIY drybox and found some resolution for my drybox. And now I did made the drybox for just below RM 30.00 (approx. USD 10). Below are the steps i took in making the drybox...
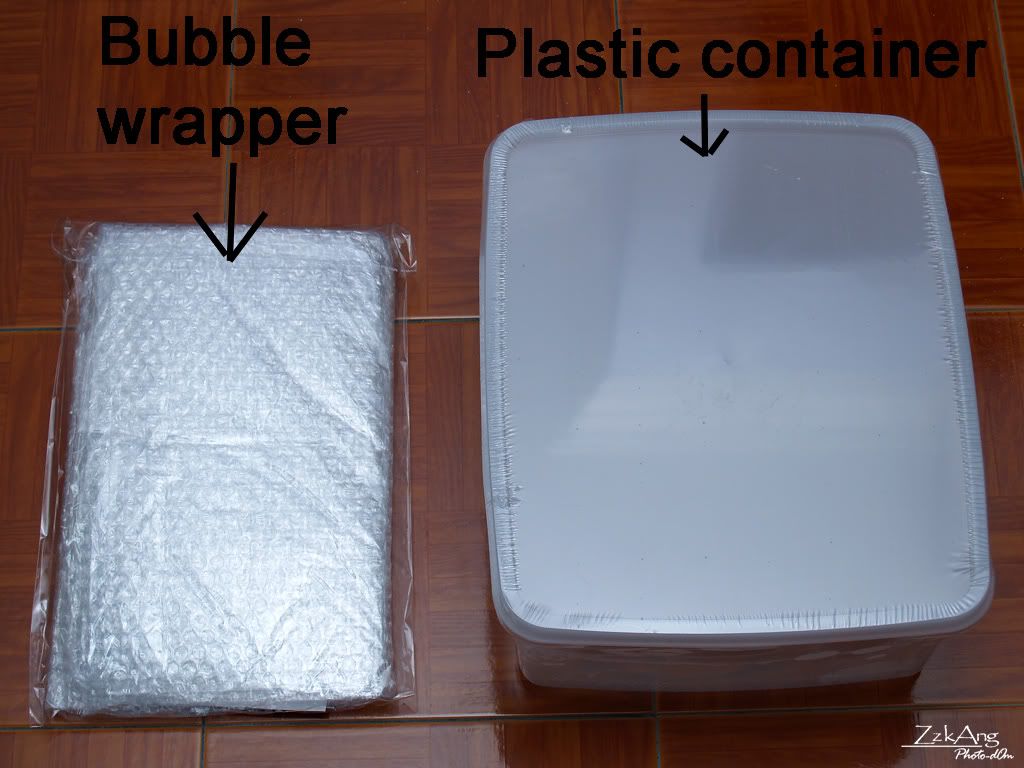
First of all, I bought a plastic container and bubble wrapper which can find easily in the town...
Then, scissor and hole-maker are available at no cost (my home had these items)...

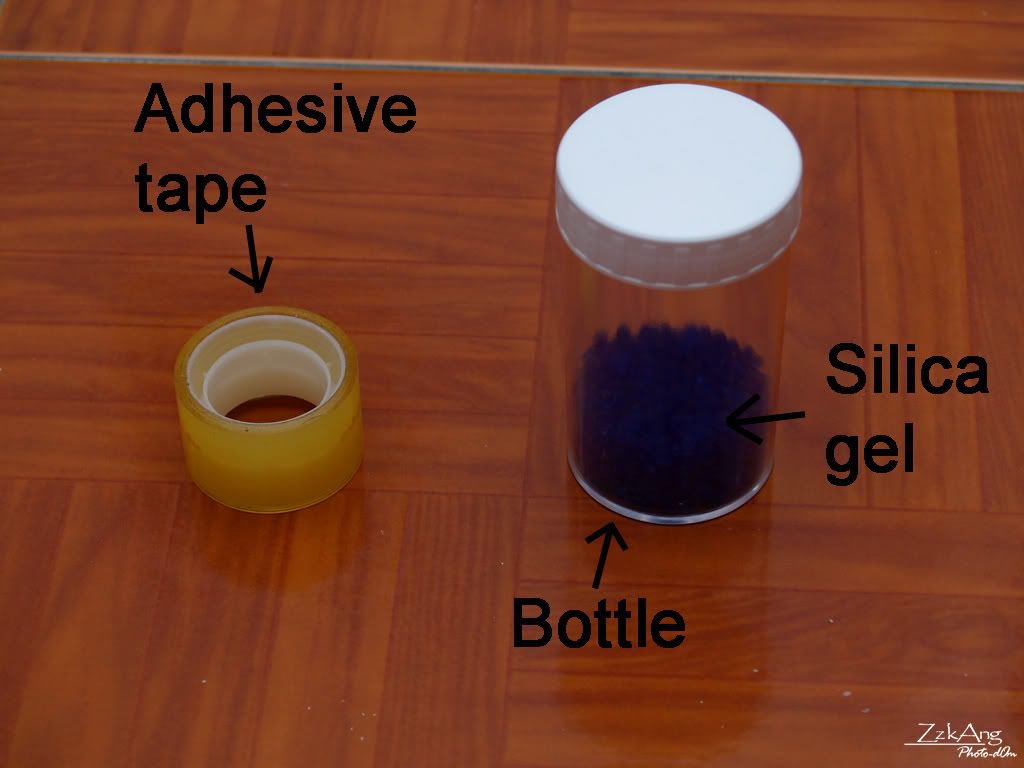
Same goes to adhesive tape where every home should have one. I get the silica gel and bottle for free from my lab... :D
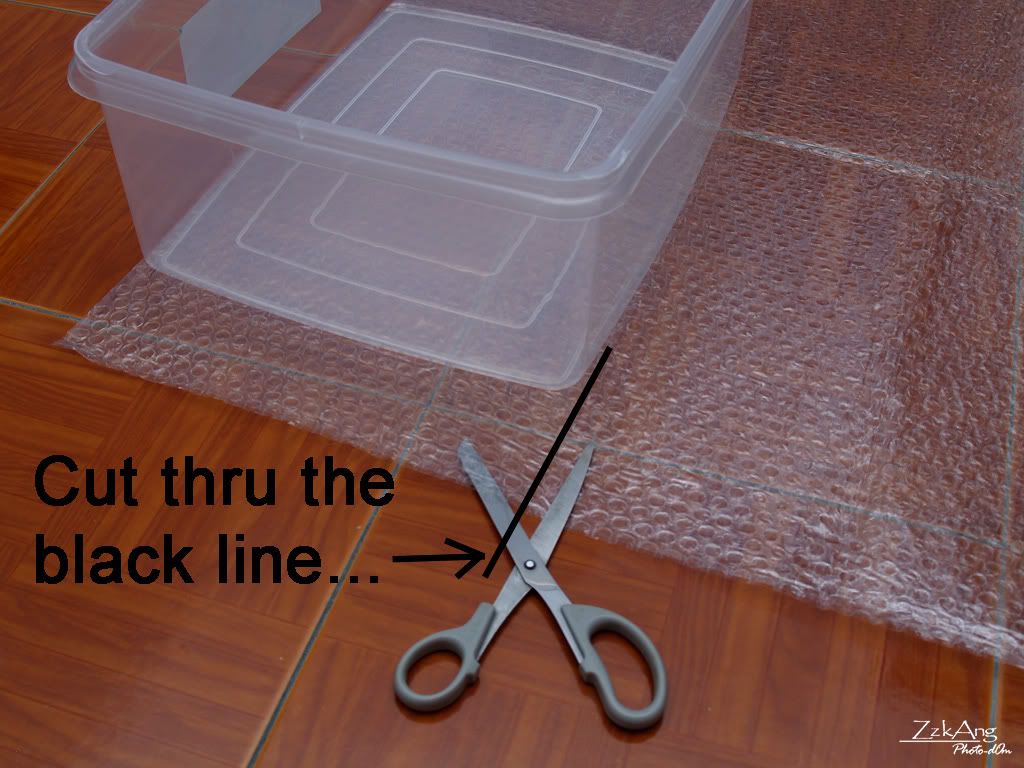
Cut the bubble wrapper to fit the container. You can use the ruler to measure the size of the container, but I took a shorter route...
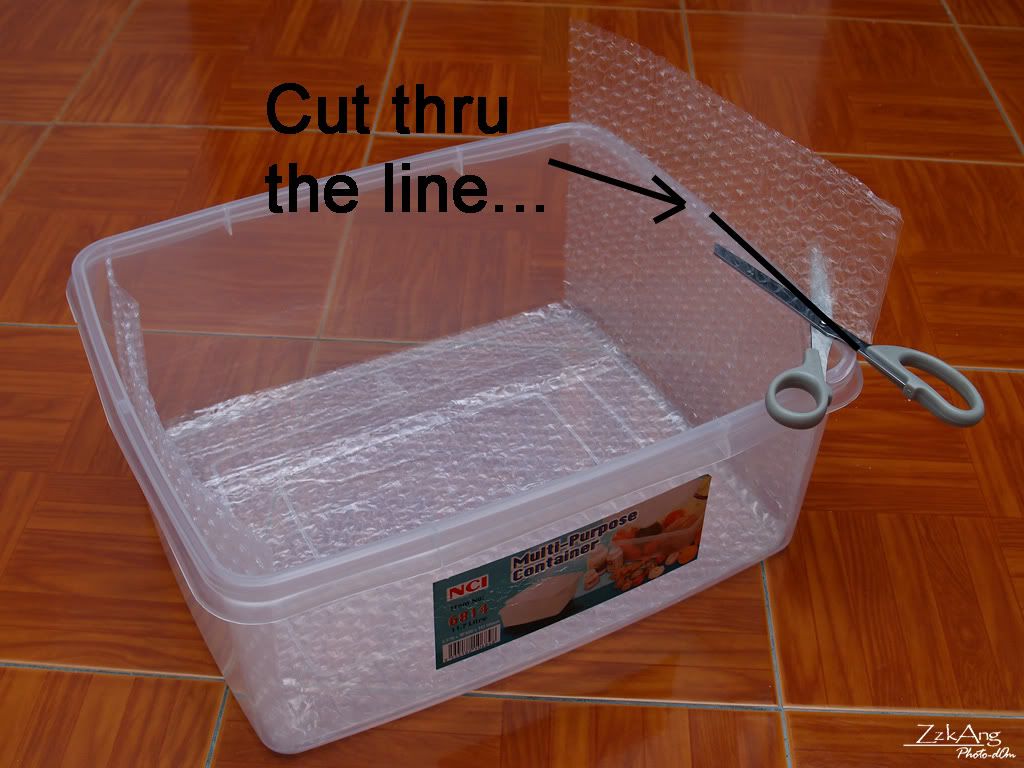
Fit in the bubble wrapper and cut off the excessive part of wrapper...
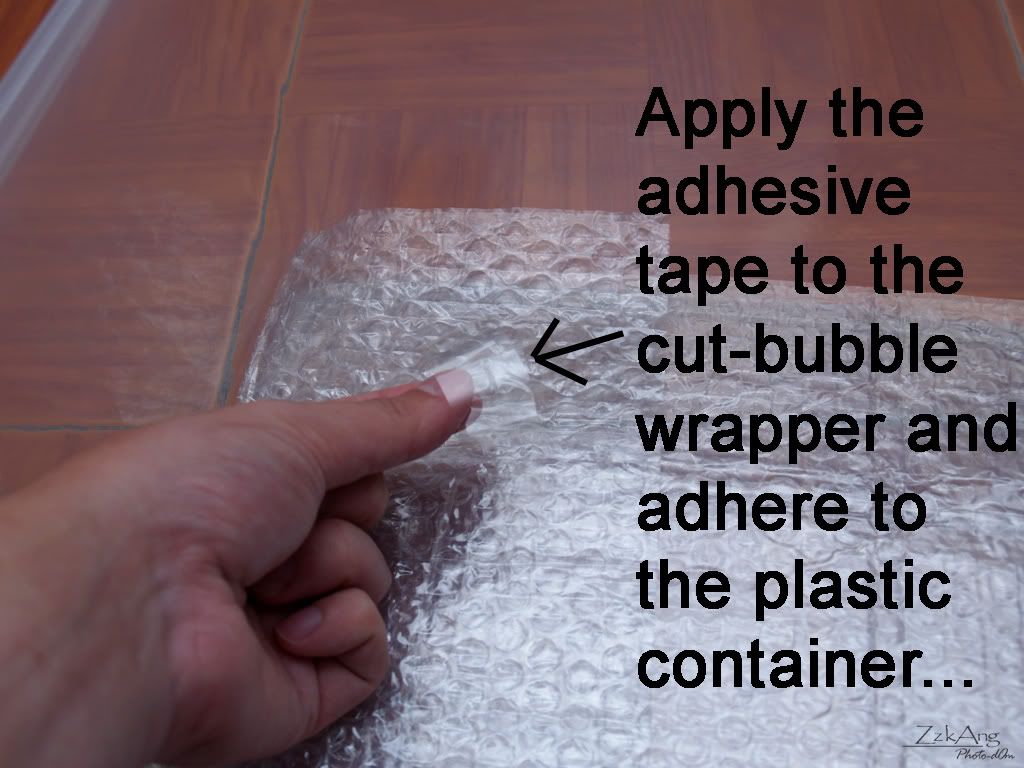
Then, apply the adhesive tape to the wrapper to stick it to the container wall...
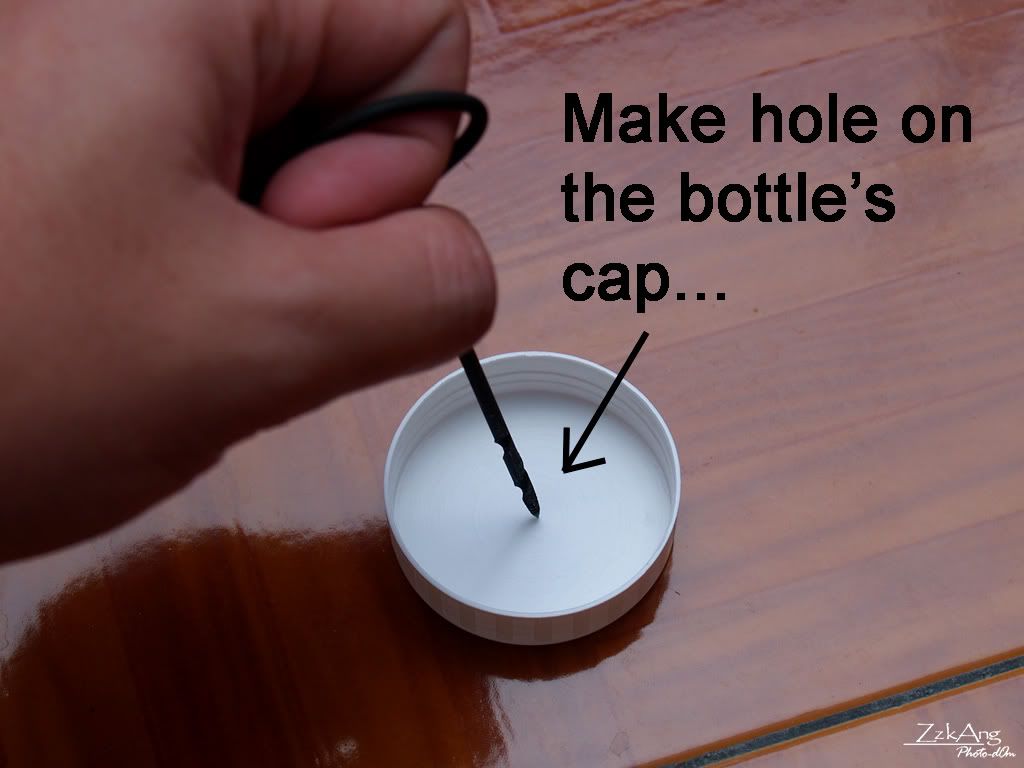
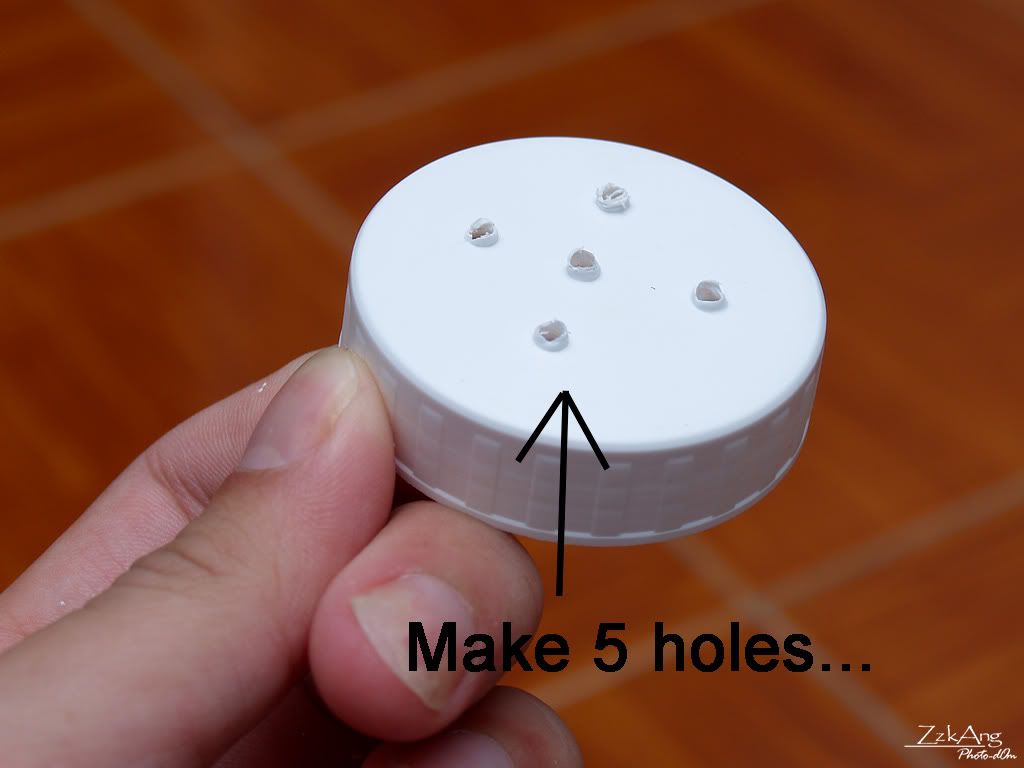
Make holes on the bottle's cap that contain silica gel...
I made 5 holes...
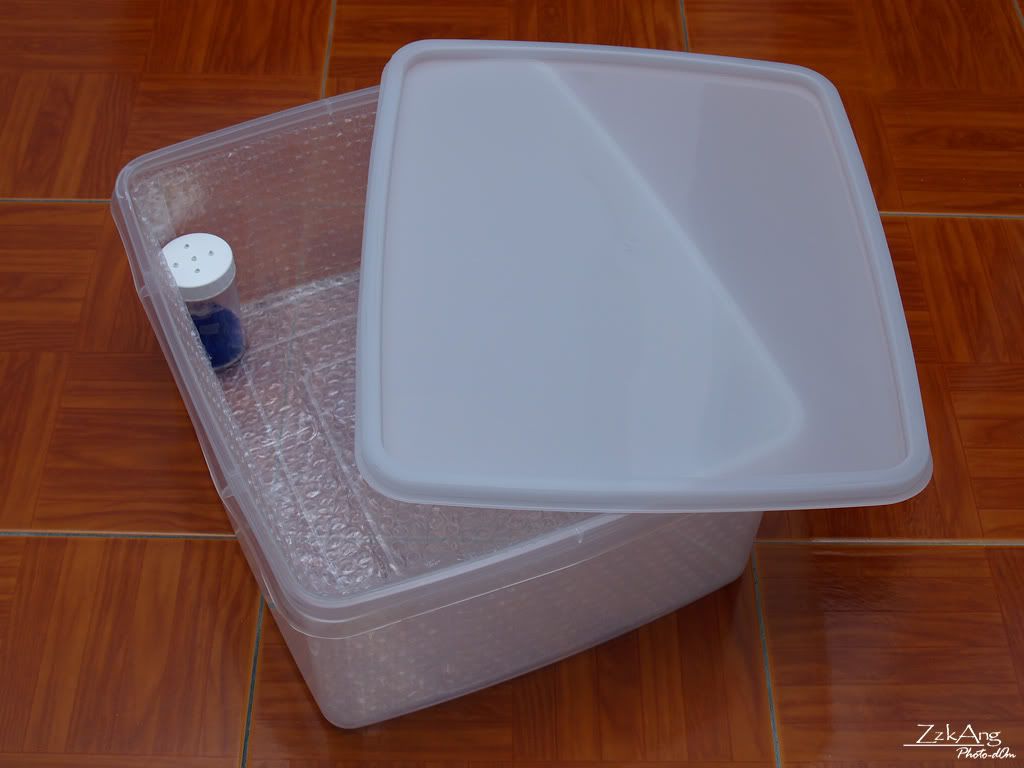
Ta daa!!!...Here's my DIY drybox for my camera equipments and accesories... :D
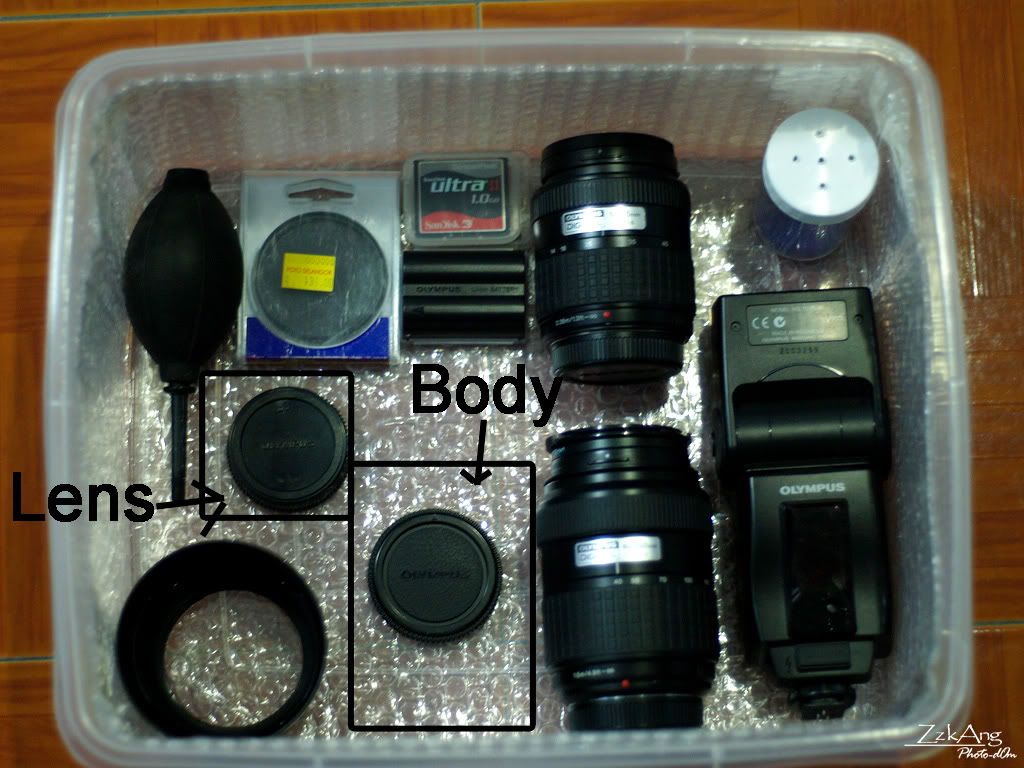
Here shows how I arrange my camera equipments and accesories in the drybox...
I hope this DIY drybox can function effectively. You can try yourself too if you facing budget problem in acquiring a drybox... :D


16 comments:
Does this work as well as those drybox purchased from the shops? Thanks for sharing this..I might wan to try this out as I don't have a dry box at the moment.
Does it work?
bug...i dont know if this works or not...its better than i simply put all the equipments all around my room.... :D well, I having silicaa gel....should be good i think..
Anony...this drybox sill 1 week old...cannot see any difference... :D
well i did the same thing last 3 weeks, but instead of silica gel, i used thirsty hippo instead.. altogether less than rm20 (:
Bryanlyt...wow..thats great...the container i bought are quite expensive :(
If you want to see the mind blowing article with real facts and figures, this has really tremendous impacts on readers.
Really the blogging is spreading its wings rapidly. Your write up is a fine example of it.
You have some interesting thoughts! Perhaps we should contemplate about attempting this myself.
This is not the first of your posts I've read, and you never cease to amaze me. Thank you, and I look forward to reading more. web designing
This is not the first of your posts I've read, and you never cease to amaze me. Thank you, and I look forward to reading more.
Valuable information and excellent design you got here! I would like to thank you for sharing your thoughts and time into the stuff you post!! Thumbs up
My version
http://yourstrulycee.blogspot.com/2013/04/diy-drybox-for-my-camera-and-flash.html
Nice.
I use a dry box i made myself too. Some tips, use a small box and fill up with your gear. That way use less silica gel & requires less reheating.
here's my set up http://jameswoo.net/diy-dry-box-how-to-make-a-dry-box/
Great Post!
UK student visa from Pakistan
Very informative
Top UK Recruitment Agencies in Pakistan
Lov Your Post!
Overseas Recruitment Agency in Pakistan
Post a Comment